Instructions - Part 10
Create Your Solutions

In the previous sections, you've built an incredible knowledge base about your problem. Now, you're going to use what you've learned to create hypothetical solutions.
Revise Your Problem Statement
Step 1: If you haven't done so recently, take a look at your Problem Statement. Just click on the Problems panel in MySolver™ and print out your Problems table. Does your problem statement accurately describe your problem the way you now understand it? If not, use the Problem Statement and Problem Redefinition tools to update it. Remember, you don't want to waste your time solving the wrong problem.
Goals
Step 2: This is also a good time to look at your Goals & Objectives. Go to the Objective Data - Problem table and sort it by Type=Goal. Print out your goals.
Step 3: You can also sort by the interrogatory dimension 'To Where' to look for your goals & objectives.
Step 4: Use the Goals tool in the Toolkit to organize your goals.

Helpful Hint: Accurately defining your problem in your problem statement and having clearly identified your goals for a successful solution are important prerequisites to make sure your aim is focused. Now, it's time to create your solutions.

Analogies and Metaphors
Step 5: Go to the Analogies tool and create new ideas by generating analogies.
Step 6: Compare your problem to an analogy using the Similarities and Differences tool.
Step 7: Use the Structured Analogies Matrix tool to compare your problem to multiple analogies.
Step 8: Generate Metaphors to create new ideas.
Hypotheses, Scenarios, and Indicators
Step 9: Create hypothetical solutions using the Hypothesis Generator tool.
Helpful Hint: Your solution may not be one big solution. It could be fragmented into many smaller solutions. Break your problem down into smaller parts. Look at solving each part separately. Attack one problem at a time. If there are multiple problems, you must decide which one needs to be solved first.
Step 10: Use the Multiple Hypothesis Generator to create multiple hypotheses from a single hypothesis.
Step 11: Examine possible outcomes using the Scenarios Matrix tool.
Step 12: Track your scenarios with Indicators.
Step 13: Use the Indicators Matrix tool to analyze your indicators and scenarios.
Alternatives
Step 14: List your Alternatives.
Step 15: Look for Hotspots.
Step 16: Make sure you understand the need for Rival Hypotheses.
Name Your Solutions
Step 17: Think of short descriptive names for each one of your solutions. This name will be used throughout the computer system and you will NOT be able to change it later.
Login to MySolver™
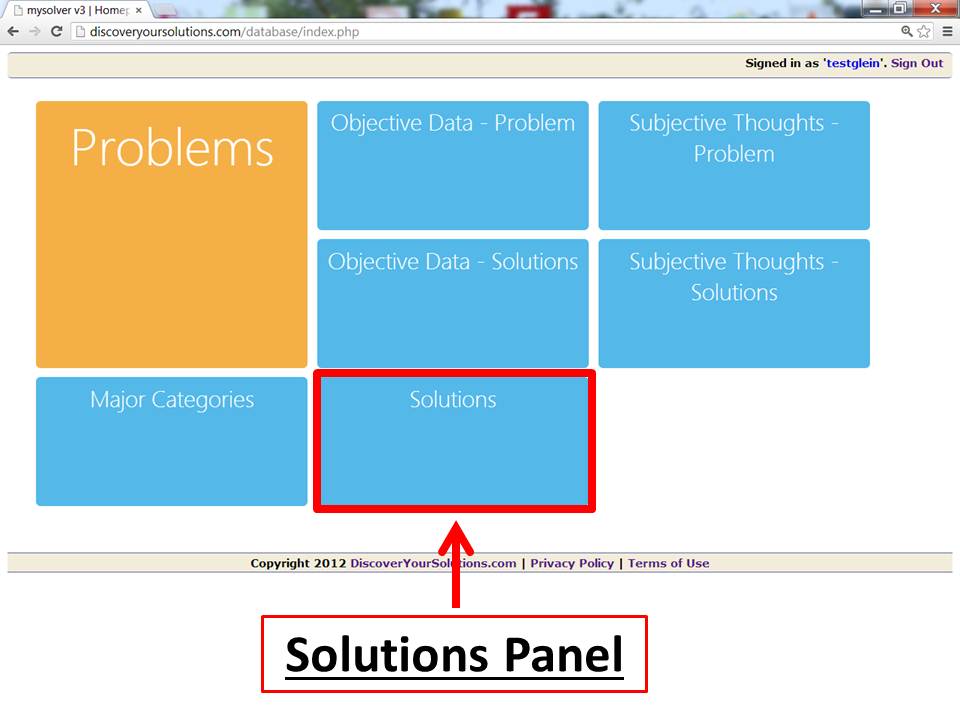
Step 18: Once you've decided on the names for your solutions, login to MySolver™. Go to the Homepage Main Menu and click of the 'Solutions' panel.

Screenshot of the Main Menu for MySolver™ with the Solutions panel outlined in red (click to enlarge).
Add Your Solution Name to the MySolver™ Database
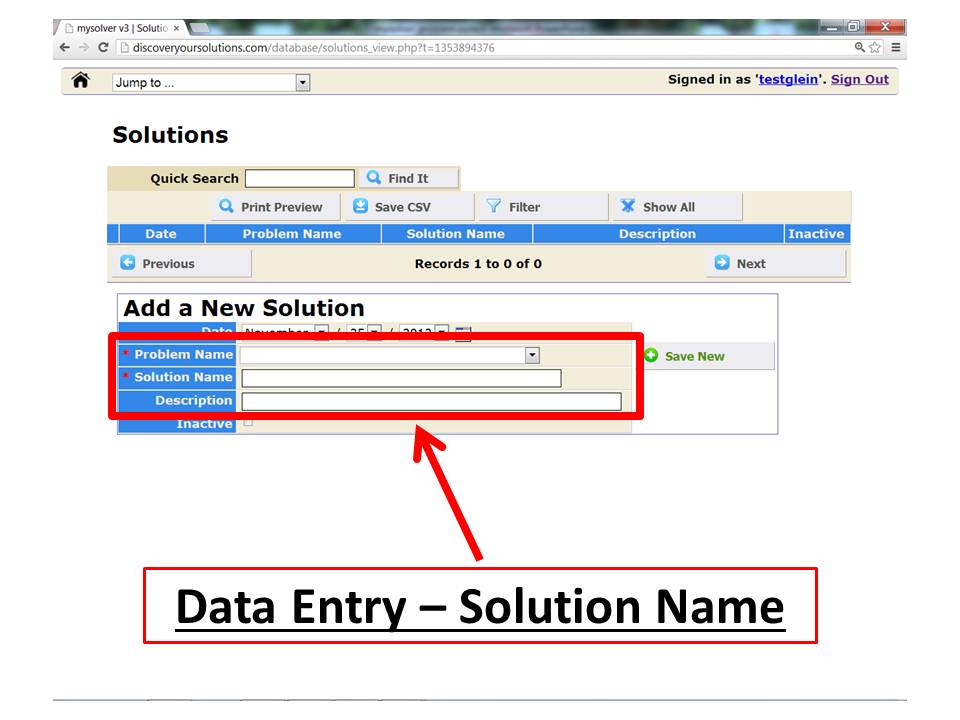
Step 19: Select the appropriate Problem Name that this solution applies to, then enter your new Solution Name into the MySolver™ database. You can add a description of your solution if you'd like (that's optional).

Screenshot of the data entry form for MySolver™ with the Problem Name and Solution Name fields outlined in red (click to enlarge).
Step 20: Save New.
Step 21: Use Back to clear the form, then enter the rest of your solution names into MySolver™.
Go to the next step, click Analyze your Objective Data about your Solutions.

Click to return to Instructions Main Menu.
