Instructions - Part 4
Name Your Problem
The first task you need to do in the MySolver™ database program is to 'name' your problem.
Pick a Name for your Problem
Step 1: Think of a short descriptive name for your problem. This name will be used throughout the computer system.
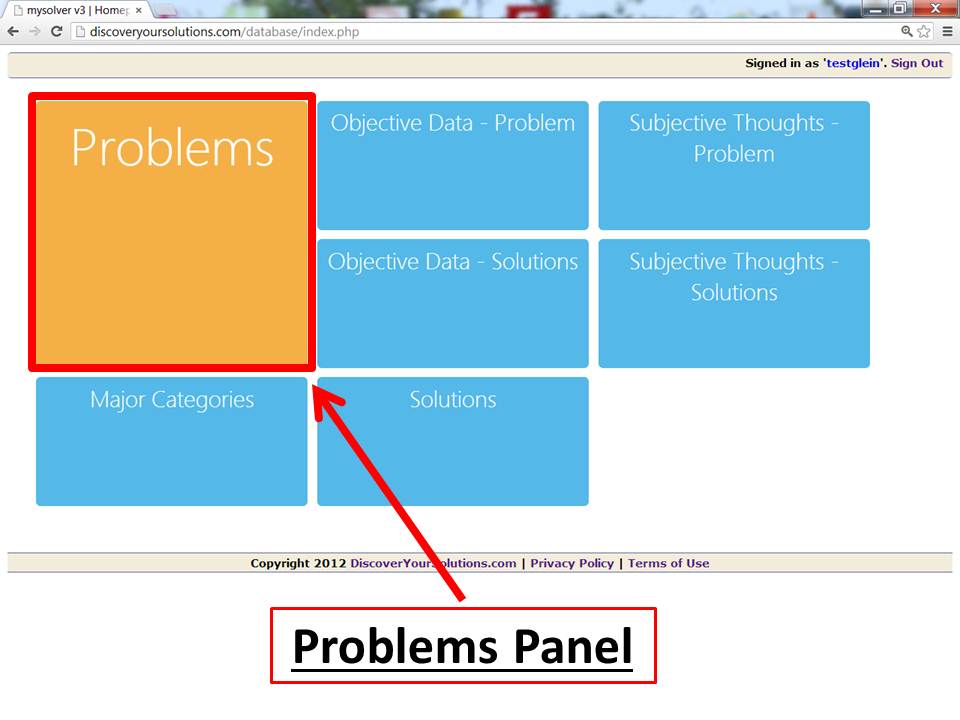
Step 2: Once you've decided on a name for your problem, login to MySolver™. Go to the Homepage Main Menu and click of the 'Problems' panel.

Screenshot of the Main Menu for MySolver™ with the Problem panel outlined in red (click to enlarge).
Helpful Hint:
The 'panels' may be displayed in a different pattern depending on your monitor size and browser zoom settings.
Enter your Problem Name
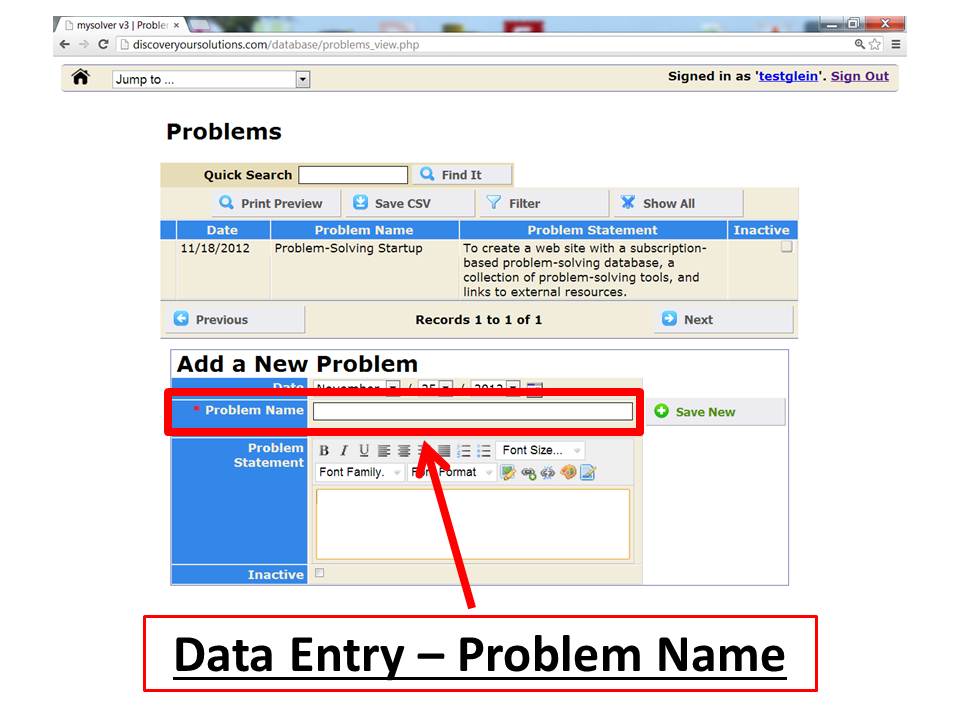
Step 3: Enter your new Problem Name in to the MySolver™ database.

Screenshot of the data entry form for MySolver™ with the Problem Name field outlined in red (click to enlarge).
Step 4: Save New.
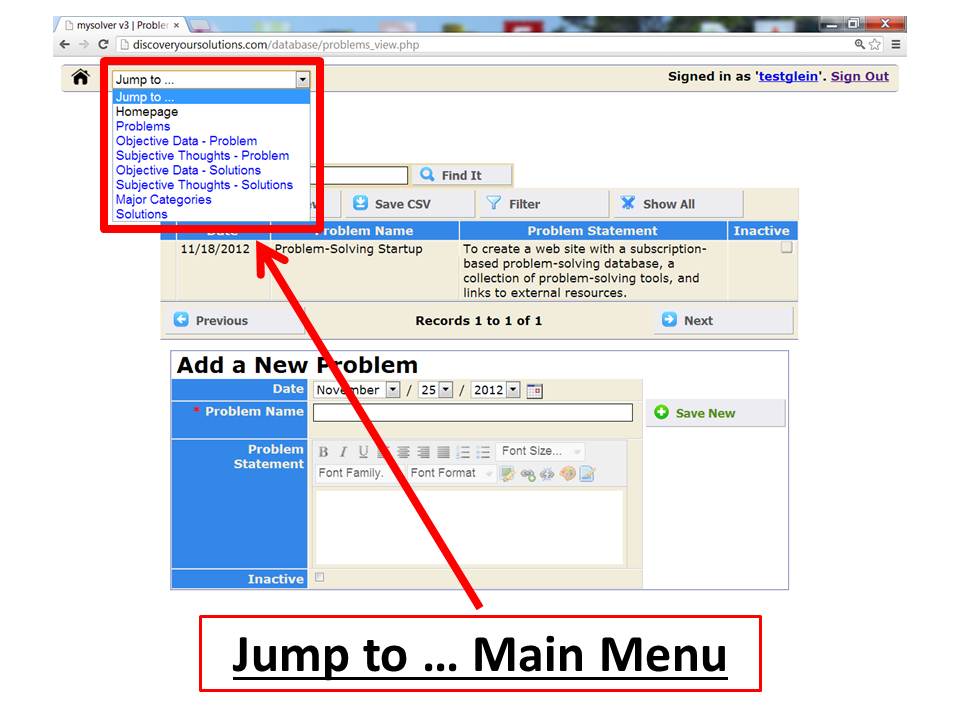
Jump to ... Main Menu
Step 5: To navigate inside MySolver™, use the 'Jump to ..' main menu located in the upper left-hand corner of each page inside the database. You can 'jump to' anywhere else in the database from this menu.

Screenshot of the 'Jump To...' Main Menu for the MySolver™ database (click to enlarge).
Go to the next step, click Write Your Problem Statement.

Click to return to Instructions menu.
